Showing posts with label gluten free. Show all posts

Sunday, May 27, 2012

Cauliflower "Gratin" (gluten, cow dairy free, dairy free option)

I was going to put "potato free" on this *laugh* but figured out and out telling people it used cauliflower PROBABLY makes you assume that it's potato free ;).

I was asked by a Facebook member to share this recipe as I mentioned I was making a potato version of this dish one night and she was intrigued by it.  So, this one if for Pam.

Last Thanksgiving I was mainly concerned about getting big flavors into the meal without the garlic, so I went searching and found Autumn Potato Gratin while watching one of my 30 Minute Meal DVD's.  I loved the idea of the simplicity of it, made it and BOY did we love it.

Unfortunately, due to all the very RICH cow dairy in it, it also caused some tummy troubles with me.  So, one night, desperately seeking a different way to make potatoes, I decided to try the recipe and tweak it to be more tummy friendly.  And MAN it was yummy.

So, I've continued to tweak it and the last couple of times I made it I made it with cauliflower instead of potatoes (which is a lot easier for ME to digest, I don't know about other people).  My husband LOVES this dish and it is a great way to get your husband err...kids (or in my case, daughter, as my son can't eat coconut) to eat their veggies and them not know that they are getting something good for them while you are doing it ;).

I've made this recipe quite a few times.  In this version I used a hard sheep's cheese (basically the sheep equivalent to Parmigiano Reggiano.  I got mine at Fred Meyer) that I grated, BUT if you can't do dairy of any type (I tolerate goat cheese and sheep's cheese pretty well) I HAVE made this with a combo of the parmesan "cheese" recipe I have here and some Daiya cheese sprinkled over the top for the melting factor.  Just sprinkle a couple of good handfuls of the vegetarian parmesan and then a good handful of Daiya (or whatever cheese alternative you can do) over the top of the dish and bake as directed.  It works just as well.


Cauliflower "Gratin" (gluten, cow dairy free, dairy free option)

  • 1 Large head cauliflower
  • 2 cans full fat coconut milk (I use the brand here and love it).  
  • 3 to 4 sprigs of your favorite fresh herbs (in this recipe I used 1 good sprig of fresh thyme, one of rosemary and a sprig of sage)
  • 1 Shallot chopped coarsely (or if you can do garlic just take about 2 cloves of garlic, smash and peel them and you're good to go)
  • 1/2 cup (about) grated hard sheep's cheese (or whatever you use for a Parmesan cheese alternative with some other "cheese" to sprinkle on top)
  • 1/4 tsp. freshly grated nutmeg (just eyeball it)
  • Salt and pepper to taste

1.  Preheat oven to 350 degrees.

2.  Combine 1 can of the coconut milk, your fresh herbs of choice (don't bother trying to peel the herbs, just put the sprigs in whole), the shallot/garlic and the nutmeg in a small saucepan.  Heat over low heat until heated through and simmering (about 10 minutes).

3.  In the meantime, take your cauliflower and remove the heart from it and then cut the head into bite sized pieces.  Spread pieces evenly in baking dish of choice (I used a one inch deep like 8 x 11 pan I had, but an 8x8 pan would work just as well).  Once coconut milk is nice and hot and smelling very "herby" take a wire mesh strainer over your baking dish of cauliflower and strain the coconut milk as you pour it into the pan over the cauliflower (it just plain saves you from having to strain the milk into another container and then pouring it over the cauliflower).  Discard leftover herbs and shallot/garlic.  Take your second can of coconut milk and add to the dish of cauliflower until it comes up even with the tops of the cauliflower in the dish (you want the milk to cook into the veggies, of course).  Sprinkle grated cheese (or your cheese alternatives) over the top of the dish.

4.  Bake in 350 degree oven for 35 to 45 minutes or until you smell the yummy smell of the gratin and the top starts to turn golden brown and the cauliflower is done.

5.  Take out of oven and let sit for about 5 minutes before serving (to let it cool down a little) and sprinkle  salt and pepper on top of the dish to taste.  

Serve with meal of choice.  I've served this with baked chicken, steak...you name it and it goes well with it.  Serves 4.

Enjoy!

 This Post Was Linked to Whole Food Fridays

Friday, May 25, 2012

Gluten Free Nankhatai (Gluten, Egg, Corn free with dairy free option) and Crazy Good Spiced Tea (Refined Sugar, Dairy Free)


Sorry for the lack of posts the last couple of days.  I've been neck deep in paperwork trying to get pre-approved financially for the house we have been pining to buy (we didn't make that cut unless the buyer will take about 30,000 dollars less than they want for a purchase price right now *sigh*) and trying to get paperwork filled out for my son to get a grant for some therapeutic equipment.  Results are clenching jaw due to stress and when you're doing that on a broken tooth you can then write your own book on stress induced migraines.

So, last night, after a "fun filled day of paperwork adventure" I decided it was time to do something necessary, something that had been cooking in my brain all day after seeing Megan's new awesome looking cookies on The MAID in Alaska Facebook Page.  It was time to bake me some cookies, put together one of my favorite drinks I make and sit on my behind on the couch and watch Muppets with my kids.

I decided it was a Nankhatai type of evening.

One of my favorite cookies of all time, ironically, before going gluten free was made with primarily whole wheat flour.  Nankhatai (it's an Indian dessert) is ALMOST a savory cookie.  It's two main flavors are cardamom and whole wheat flavor and then they are garnished with, of all things, pistachios (which believe me if you can, try it, as they add a wonderful flavor to the cookie and give you a salty little tid-bit in the middle to enjoy).  Unfortunately the "whole wheat" thing is out, of course, now that I've gone gluten free (not that I'd miss the stomach upset I used to have after eating their yumminess anyway :), so I've been working on trying to at least come CLOSE to re-creating this cookie gluten free.

And I've come close.  I had to add more binders to the recipe and increase the fat to make the cookies...well be cookie-like instead of just crumble as the original cookies are held together with just out and out gluten from whole wheat flour and a little bit of fat.  Yeah, that wasn't going to work here.  So, after a couple of tries, I came up with this recipe and with the tea they are DIVINE!

Just a note.  If you like buckwheat at all, try to use it (I've added where you'd put it in as a option).  It lends a really nice nutty tone to the cookie.  Since buckwheat can overpower recipes, though, I opted for the straight sorghum flour as the main option for secondary flours here...it lends to a slightly sweeter cookie and is more of a "traditional" type of cookie.

How good are these things?  My SON took one out of my hand while we were watching the movie and kept biting off hunks on it.  He'd wipe the crumbs off his tongue (texture issues), but he kept coming back for more to taste it.  I tried not to cheer as it's SO rare my son explores food.  So, yeah, I think these got the autistic seal of approval too :).

They're aren't your traditional Nankhatai, but they are close enough for me and trust me if you can pair it with the tea.  The Crazy Good Spiced Tea is wonderful hot right off the stove, but if you let it cool it makes a wonderful iced savory tea drink and if you let it cool and throw it in with some crushed ice you have an awesome tasting smoothie!  You can also redo the recipe for coffee too.  Just take out the water and tea bags in the recipe and instead add 1 1/2 cups of coffee to it instead to give you a savory spiced coffee for an after dinner treat.


Gluten Free Nankhatai (Gluten, Egg, Corn free with dairy free option)

  • 1/2 Cup Teff Flour (use Brown Rice if you don't have teff)
  • 1/2 Cup Sorghum Flour (for a richer, nuttier type of flavor use 1/4 cup sorghum and 1/4 cup buckwheat flour)
  • 1/4 Cup Tapioca Starch
  • 1 Tsp Guar Gum or Xanthum Gum
  • 1/2 tsp. baking powder (I use Hain Featherweight)
  • 1 tsp. ground cardamom
  • 7 TBS butter (softened) or coconut oil (not melted)
  • 1 TBS flax meal
  • 3 TBS boiling water
  • 1/2 cup brown sugar or palm sugar
  • Halved Pistacios or blanched almonds for garnish (I like pistacios myself)

1.  Preheat oven to 325 degrees F

2.  Make flax/chia egg by combining flax/chia meal and water together in small bowl.  Let sit until gummy and egg-like in texture.

3.  In a medium mixing bowl combine flours, starch, gum, baking powder and cardamom.  Stir well with hands to combine.

4.  In another bowl cream together sugar and butter/coconut oil.  Add sugar and butter/coconut oil mixture to the dry ingredients, add flax egg and mix well to combine.

5.  Taking your (clean) hands shape dough into 1 inch balls and place on a parchment lined cookie sheet.  Press balls down slightly and press a pistachio or 1/2 of a blanched almond into the middle of each cookie.

6.  Bake for 25 to 30 minutes or until the bottoms are slightly brown.  Let cool for 5 minutes before removing from cookie sheet.

Let cool completely before consuming.  Serve with Crazy Good Spiced Tea (recipe below).


Crazy Good Spiced Tea (dairy free, refined sugar free)

  • 1 1/2 Cups Water
  • 1 can full fat coconut milk
  • 3 teaspoons loose black tea or 3 tea bags black tea (I use Stash Super Irish Breakfast Tea)
  • 1 tsp. ground cardamom
  • 3/4 tsp. almond extract (be sure to use pure with no added colorings for the sake of corn allergies)
  • 1 cinnamon stick, approx. 3 inches
  • 3 whole cloves

Combine all ingredients in a pan and heat to JUST a boil.  Reduce heat and simmer for 15 minutes.  Strain out spices and tea/tea bags and serve.

Makes approximately 5 servings hot.  Sweeten to taste with honey or palm sugar.  Can also be cooled and served over ice, or combine with approximately 1/2 cup crushed ice to make a very awesome smoothie.

Monday, May 21, 2012

Super Yummy Oatless-nola Bars (Oat, peanut, gluten and corn free Granola Bars)

So, this is one of those recipes that you work on forever and FINALLY get it right.  I've been trying to come up with a oatless granola bar recipe for a while (not a small feat mind you) and finally worked out this one after taking into consideration every allergy my kids have.  And it turned out yummy, has LOTS of good for you things in it too...I'm not sure if they'd have enough protein to count as a protein bar, but I still say that they contain some good for you things in there (okay, so the chocolate was to bribe the kids to try it.  Yes, that's my story and I'm sticking to it *laugh*).

I actually am eating these a lot lately as they are a super easy gluten free breakfast to grab and go with (been busy lately to say the least).  And using the quinoa flakes they are pretty easy to digest compared to the lead ball effect that traditional granola bars have (at least to me...me and oatmeal have always sort of had a love-hate relationship).

Now to just convince my kids to eat them...


Super Yummy Oatless-nola Bars (Oat, peanut, gluten and corn free Granola Bars)
  • 1 3/4 Cups Quinoa Flakes
  • 1/2 cup brown sugar or Palm Sugar
  • 1/3 cup almond flour (I use Honeyville)
  • 1/2 tsp cinnamon
  • 1 cup dried fruit(s) of your choice (I used craisins and figs)
  • 1 cup nuts of your choice (I used Blue Dimond Almonds as they're peanut free), chopped fine
  • 1/2 Cup Perky's Crunchy Flax cereal (you can also used puffed rice cereal)
  • 1/3 cup almond butter
  • 1 tsp vanilla
  • 6 Tbs. butter, melted or coconut oil (also melted)
  • 1/4 cup pure maple syrup
  • 1 to 2 TBS Enjoy Life Chocolate Chips

1.  Preheat oven to 350 degrees F.

2.  Line an 8×8 pan with foil or parchment paper (I used aluminum foil) and hit it with non-stick cooking spray (or just grease it, but be sure you grease it well).

3.  Stir dry ingredients together well.  Then, in another bowl whisk the  liquid ingredients together.

4.  Add the mixtures together (if the mixture is dry and sort of crumbly add a little bit of water until the mixture is sticky and sort of moist) and press it very firmly (note FIRMLY...this will help to keep the bars from falling apart on cutting later) into pan.

5.  Bake for 25-35 minutes. They will be browned on the edges and a little on top but seem soft if you touch the center.  Let cool completely before cutting.  Wrap in waxed paper and store in an airtight container for about a week and then transfer to freezer.

Enjoy all!  I know I am :).


Saturday, May 19, 2012

Easy "Caramel" Dessert Topping (Gluten, Corn, Soy, Peanut, Refined Sugar Free, Dairy Free Option). No Cooking Involved!

Okay, I guess I lied a LITTLE with the title because you will have to melt butter and/or butter alternative spread.

So, when I was concocting a gluten and oat free granola bar recipe yesterday I started with about four different recipes that I started to combine in different ways to get my "binder" where I wanted it to be.  Sounds odd, yes, but that's usually where I start my brainstorming sessions when it comes to cooking and baking.

Anyway, with the third try I mixed ingredients together in a bowl and the binder ended up looking at this...

Looks sort of like caramel sauce doesn't it?  I then tasted it.  And darned if it didn't taste darn CLOSE to caramel sauce too.  And the best part is that it doesn't take a good hour cooking on your stove to get it to this consistency and it's not pure sugar.  Those are both bonuses in my book.

My husband likens the taste to a "sort of butterscotch flavor, but I don't like butterscotch and I like this sauce, so it doesn't taste too much like butterscotch" (yes, it made me look sort of confused too *laugh*).  To ME it tastes almost like the caramel dessert sauce you buy to pour on ice cream...you know the one that as soon as a corn allergy breathes in your general direction you immediately throw in the garbage never again to enter your house when you realize how much other stuff they add to that stuff BESIDES corn.

You can, by the way, use coconut oil with this, but I have to say that it doesn't really work very well.  I tried it with several different amounts and I put the one that works the best as the "if you use coconut oil alternative" but I really found with the coconut oil you can not only taste the coconut oil, but you can also taste the other flavors as well.  I honestly don't know if you'd be able to taste it if you ate coconut oil all the time, but I don't so I could taste it.  If you can do it I'd go with Earth Balance or some other "buttery" tasting alternative.

So, here you go folks!  A really SUPER simple dessert topping you can throw together in three minutes flat.  If you store this in your fridge, by the way, it'll solidify so be sure to microwave it for about 10 seconds when you pull it out of the fridge to get it back to dessert topping" consistency.

Super Easy "Caramel" Dessert Topping  (Gluten, Corn, Soy, Peanut, Refined Sugar Free with Dairy Free Option)
  • 1/3 cup almond butter (I use Barney Butter, it's peanut free and soy free)
  • 1 1/2 tsp. pure vanilla extract
  • 6 TBS melted butter, butter alternative spread (such as Earth Balance) or coconut oil (if using coconut oil reduce amount to 4 TBS)
  • 1/4 cup pure maple syrup (at LEAST grade B please)

Combine all ingredients in a bowl and whisk well to combine.  And serve!

Taaaddaaaa! We've been enjoying ours with apple slices dipped in it.  And my daughter *leans in close* doesn't know she's eating nut butter!  Bwahahahhahahaha!!!

Ahem.  Anyway folks, I hope some of you out there can use this and that it'll help getting some nutrition down your kids a bit easier :).

Enjoy!


Friday, May 18, 2012

DIY Taco Seasoning (Garlic Free)

I know, not an overly exciting photo.
So, this is one of those recipes that was sort of a list of a "need" more than a "want" when it came to garlic free seasonings.  So, I came up with this recipe and I have to say that it works well, gets the job done and my husband swears he can't tell the difference between this stuff and the stuff you buy at the stores.

Now mind you this DOES have several steps because you are going to have to make your own chili powder (commercial ones contain garlic).  So, here you go folks.  Enjoy :).

First you're going to need...

Garlic Free Chili Powder
  • 1 Tsp. Paprika 
  • 2 Tsp. Cumin 
  • 1 Tsp. Chile Powder (ground up dried chiles) 
  • 1 Tsp. Oregano 
  • 2 Tsp. Onion Powder 
Mix up all ingredients in a bowl and then store in an airtight container (I actually use tablespoons instead of teaspoons AND double the recipe on this since I go through chili powder like mad and I store it in an old salsa jar)Use within one year.

And now, onto the main event!

DIY Taco Seasoning (Garlic Free)

  • 1/4 cup garlic free chili powder (recipe above)
  • 1 1/2 Tsp. Cumin
  • 1 Tsp Oregano
  • 1/2 tsp. Paprika
  • 3 tsp. onion powder
  • 1 tsp each salt and pepper

Mix all ingredients in a bowl and store in an airtight container.  Use as you would regular taco seasoning.

Ranch Dressing Recipe (Garlic, Corn and Egg Free)

First, I'd like to say that sorry I've been out.  Or, "out of it" would be more apt in this case.  It's been crazy around here with end of the year school stuff going on and in the middle of all of that my husband and I finally found a house that we REALLY want (and yes, we've been looking pretty darn near constantly for 11 years now), so I've been trying to figure out the ins and outs of first time home buyer loans and the like (we rent right now).  I'm really TRYING to curb my excitement and praying that the Good Lord has this home in mind for us and will help us to get it at the payments we'd need, but it's in His hands (and finding a bank that is willing to work with us).

In the middle of all of that craziness I ended up with dental problems.  I'm not sure if it's due to gluten issues when I was young (the ND's theory, which makes sense honestly), but when I hit about 12 years old my teeth went to crap on me and I have MULTIPLE fillings in a lot of my molars.  I had to get one cap on a couple of months ago as I had a terribly deep cavity that was on the verge of root canal status if I didn't take care of it ASAP, so the dentist and I decided to try and hold off putting a cap on one of my lower molars that I felt was stressing under the pressure of all of the fillings and just pray it held together until my other cap got paid off.

Well, it didn't.  While eating, of all things, a VERY soft piece of bread (I didn't even TOAST it first!) my molar just plain disintegrated on me.  I'm now missing 1/2 of one of my bottom molars and unfortunately the fillings that ended up falling out after the tooth disintegrated were also deep fillings, so I'm in considerable pain.  And my dentist is out of town until Tuesday, so I'm on Vicatin and Penicillin until then.  Fun times.

Anyway, I couldn't let tooth pain get me down with my daughter's last day of preschool party.  I had gotten a veggie tray at the store (I know, overpriced, but it fit the schedule this time) and it came with some prepared Ranch dressing full of all KINDS of neat sounding preservatives, corn and other allergens.   Not ideal by any means.  So, I came up with this alternative to combat the multiple allergies in my daughter's class:  corn (my son and daughter and another kiddo), peanut and garlic (in case my son was there), gluten, soy and pork.

This recipe DOES contain dairy, but if you can't do dairy, I've got a cool alternative for you.  This is a mix of dried seasonings you can mix up and throw into a jar to mix up later (handy dandy :) and I'll give you some alternatives at the end here.


Ranch Dressing (Garlic, Corn, Egg Free)
  • 2 TBS Ranch Dressing Dry mix (recipe follows)
  • 1 Cup Buttermilk
  • 1 Cup Sour Cream (Tillamook, available in Alaska and other places is corn free, Nancy's sour cream in the Organic foods section is also corn free)

Whisk together well and store in a mason jar or other "dressing" container.  This is a tangier than regular Ranch due to the lack of mayonnaise (unfortunately most egg free mayo has that darned corn in it), but it's pretty darn good.  If you want it less tangy just add a squirt of honey and whisk again until it's the right sweetness you like.  This should last at least a week in the fridge, although I doubt it'll last that long.

Ranch Dressing Dry Mix (garlic free):
  • 5 TBS dried minced onion
  • 4 TBS dried parsley flakes
  • 4 tsp salt (I use a fine grain sea salt for this)
  • 1 tsp onion powder
Mix together well and store in a spice container (1/4 pint mason jars are wonderful for stuff like this :).  Use directions above to make ranch dressing. 

If you can not do dairy, but can do eggs, here's a good alternative recipe for you.

Ranch Dressing (dairy and garlic free)
  • 2 TBS Ranch Dressing Dry Mix (recipe above)
  • 1 Cup Mayonnaise or Vegannaise
  • 1 Cup Dairy Free Sour Cream (it's made with sunflower seeds, so it's really allergy friendly looking and looks relatively simple to make :).
 Whisk together and store in a mason jar or other dressing container.  Use within 1 week.

No one with allergies should have to eat boring :).  Enjoy all!

Monday, May 14, 2012

Ground Meat Beef Jerky (garlic free)


So, since getting my food dehydrator...yeah I've gone a bit nuts with it *laugh*.  Anyone remember the show "Friends"?  Remember the episode where Chandler got a new roommate that was obsessed with dehydrating everything in the food dehydrator?  Yeah, I didn't think so *laugh*.  I'm not QUITE that bad, but my husband has been reaping the rewards of me experimenting with beef jerky for sure.  He's actually spreading it around for others to try and has been getting rave feedback, so I SUPPOSE it's not bad ;).

I kept making the beef jerky with like thin cut beef roasts and such and while it was tasty it was KILLING my teeth.  And then, one fine day, I was looking through my copy of Eat Like a Dinosaur and they did the coolest thing with one of their beef jerky recipes (and by the way if you are looking for cool ideas buy that book!  It's awesome and I'm not even THINKING of us going paleo :).  They made it with GROUND meat!  And that got me thinking to the beef jerky you'd buy at the store and how a lot of it IS made with ground meat, and voila!  An idea was born.

SO, I came up with this recipe.  It's super tasty, super tender (since it's ground beef) and you could make this with ground turkey, bison, buffalo, moose...whatever you have on hand.  It's a strong enough flavor I think it'd hold up quite well to different types of meat.

I'd also like to thank Paleo Parents for coming up with the tomato paste idea.  I tried this recipe with and without the tomato paste and BOY does the tomato paste add a depth of flavor to it :).

So, here you are folks.  Garlic free beef jerky you can make at home.

Ground "Meat" Jerky (garlic, refined sugar free)
    
  • 1 1/2 to 2 lbs. extra lean ground beef or other ground meat
  • 1  Tbs + 1 1/2 tsp gluten free soy sauce or coconut aminos
  • 3/4 tsp. onion powder
  • 1 Tbs tomato paste ( Amore tomato paste, it's the tomato paste in the tube...is garlic free)
  • 1/2 tsp. paprika
  • 1/4 tsp. cumin
  • 1/2 tsp. chile powder (ground and dried chiles)
  • 1/4 tsp. mustard powder
  • 1/4 cup honey
  • 2 tsp. salt
  • 1 Tbs olive oil (or other oil of choice)

1.  Mix all ingredients together in a good sized mixing bowl. Use your hands to make sure the seasonings are evenly distributed throughout the meat.

2.  Refrigerate the mixture for at least a couple of hours (you can refrigerate for as long as 24, but I wouldn't go over that). Shape the meat into strips or patties and dry according to your dehydrator's directions.  Once dry let meat sit for another couple of hours in an open container to continue drying (I just turn off my dehydrator and leave the meat sit for four or so more hours) before storing.

3.  Store in fridge or freezer for optimal freshness.
My dehydrator states that you can get about 1 month shelf life, unrefrigerated (due to lack of preservatives in the meat), out of beef jerky, but I Food Saver mine as that easily quadruples the shelf life of the beef jerky (not that it ever lasts that long).

I took pictures of the beef jerky Food Savered because...well honestly it tastes GREAT, but it looks well...like icky things when you take pictures of it *laugh*.

Enjoy all!

Gluten Free Ritz/Table Crackers (gluten, egg, corn, refined sugar free)


So, my daughter has been in this, "I will make you all pay for saying that I am allergic to this THING called corn," phase of development.  I swear, if I can get through this transitional phase without a nervous breakdown I'll be one happy camper.

So, here was the "issue" that led to this recipe.  My daughter loves Ritz.  I swear it was one of her favorite foods from the time she could DO solids, so when I looked at the box and saw the dreaded corn, not once but TWICE on it (and boy did I have some choice words for Kraft at that moment), I figured I'd better work my butt off to replace said crackers or there was going to be tears (from me...Ritz is the only way my daughter will eat things like tuna fish).

So, I rolled up my sleeves and got to work.  I worked on this recipe ALL day the other day and kept coming close, but not close enough to make myself happy.  I finally nail it to the point that I'm happy, offer my daughter a cracker and she proceeds to tell me that it's icky and walk off.  Nothing says, "love" like the word, "icky" when it comes to your baking when the child wouldn't even try it first.  I finally bribed her with chocolate (oh yes, mother of the year I'm not) to try it and she ate 3/4 of a cracker happy as a clam, said it was good and then asked for more chocolate.  So, I guess it wasn't as "icky" as she thought it was.  *Sigh* kids...gotta love them *laugh*.

So, here you go folks.  Hopefully your children aren't as picky as mine.  And if they are...I'm so sorry and hang in there!

This recipe is easier than the graham cracker recipe.  It's still made in your food processor, but there's no refrigerating the dough or anything like that and I was able to get the fat content down.  If you can't do butter, I'd go with a non-dairy spread here like Earth Balance or whatever you can do that TASTES buttery (or as buttery as you can) as this is sort of a buttery-like cracker.  Whatever fat you use though be sure it's a hard fat (palm shortening, lard, heck refrigerated bacon fat would probably work) as you want the hard fat to distribute throughout the dough to give you a better crumb to the final product and make your crackers more flaky.

Gluten Free Table Crackers/Gluten Free Ritz (Gluten, egg, corn,  refined sugar free)

  • 1/2 cup sorghum flour
  • 1/3 cup millet flour
  • 1/3 cup sweet rice flour
  • 1/3 cup tapioca starch
  • 1/3 cup almond flour (I use Honeyville)
  • 1/2 teaspoon salt
  • 1 teaspoon baking powder
  • 1 teaspoon guar gum (or Xanthum gum if you don't are about the corn free thing)
  • 4 TBS cold butter cut into small chunks, or other hard fat
  • 3 TBS honey
  • 1/4 cup cold water

1.  Add dry ingredients to food processor and pulse to combine well.  Add pieces of butter (or other cold hard fat) and pulse food processor again until mixture resembles coarse crumbs. 

2.  Mix honey and water together in a liquid measuring cup and add slowly as food processor runs until dough comes together.   It should be soft and pliable.  I used the entire 1/4 cup.  If your dough is still dry and not a dough ball at this point, just add a LITTLE bit of water (like tiny amounts until it comes together as it comes together fast when it forms).

Here's a good tip.  Split your dough in half.  I ended up having to take my edge crackers off the cookie sheet at the 13 minute mark and then baking the middle crackers for about 4 more minutes to get significantly dry when I used the entire thing of dough.  When I cut it in half and got the dough universally thinner (about 1/4 of an inch or so), it worked a lot better.

3.  Roll dough out between two pieces of parchment paper and then carefully transfer the sheet of parchment paper on the bottom (with the dough) to a cookie sheet.  Cut out circular shapes (I used a spice container lid) and then dock entire thing with a fork (or you can just use a pizza cutter and make square crackers...I did that after about 3 different batches).  Bake at 325 degrees for 13 to 15 minutes (start checking at the 13 minute mark) until crackers start to turn golden brown.

4.  Cool completely before removing from cookie sheet.  Store in an airtight container at room temperature for a few days or freeze (or food saver) for longer storage.  At, what, 5 days old or so, my table crackers were still wonderful food savered and I ate some today for lunch.  Yummy with tunafish and a sliced black olive on top :).

Saturday, May 12, 2012

Super Summer Pasta Salad (Gluten,refined sugar and garlic free)

First, I'd like to apologize.  I've been waiting the last week nearly for the weather to get nice and sunny before sharing this recipe, but the darn weather has just remained ucky and overcast.  So, I am sharing this now in the hopes that I'll "un-curse" the weather and we might see this thing called "the sun" again.

One of my "guilty pleasures" during the summer used to be those Suddenly Salads.  You know the ones I mean.  The pre-packaged salads in the box that all you had to do was make pasta and throw some water into a bowl with the powder mix and suddenly you had pasta salad?

Sadly, once the food allergies kicked in and such I was terrified of making pasta salad.  Which, after thinking about it the other night I was just dumbfounded at my pasta paralysis (say that 10 times fast...dare you ;).  I mean how hard could making pasta salad be?  So, I took the jar of Canola mayonnaise out of the fridge and I got my favorite gluten free "fun" shaped pasta out of the pantry (by the way have you TRIED Jovial Rice Pasta?  Seriously it TASTES like wheat pasta and is just awesome stuff!  I actually got a lecture from my husband when I served this pasta salad because he thought I was eating gluten for his benefit and was going to make myself sick.  It was cute).

Well, it turns out it's not.  Hard that is.  Actually, it's remarkably easy to do.  And you can make a salad that tastes a lot like that boxed stuff, but with much better tasting ingredients and it takes just about as much time to make.  How sad that it took me so long to realize it!

So, here you go folks.  Super Summer Pasta Salad (you hear me weather!  I'm posting a pasta salad recipe!  Get nice out!).

Super Summer Pasta Salad (gluten, refined sugar, garlic free)

Dressing:
  • 1/3 cup lemon juice
  • 1/4 cup mayonnaise (I use Spectrum Canola Mayo as it's garlic free...not an IDEAL choice, but the kids won't eat home made, yet).
  • 1 tbsp spicy brown mustard (I use Safeway brand as it's garlic free)
  • 1 tsp onion powder 
  • 1 tbs dried parsley flakes
  • 1/2 tsp dried tarragon
  • 1/4 tsp salt
  •  freshly ground black pepper, to taste
Salad
  • 2 cups uncooked rice pasta (your shape of choice)
  • 1/2 can artichoke hearts (be sure to get the kind in water.  They'll be garlic and corn free that way)
  • 1 small shallot, finely chopped
  • 1 cucumber (I used English, but only used 1/2 of it as it was HUGE) sliced (I quarter mine after slicing just for bite sized convenience)
  • 1/4 cup black olives, sliced thin (measure the black olives AFTER slicing them up) or other olives of choice.

1.  Prepare pasta according to manufacturer directions.

2.  While pasta is cooking cut up you veggies and artichoke hearts.  Add all of your dressing ingredients to a bowl and whisk well to combine.

3.  When pasta is ready drain and then rinse WELL in cold water till pasta is nice and cold (our well is super cold so it takes like less than 30 seconds for me).  Drain well and then put in your favorite salad bowl.
Add your other salad ingredients to bowl and then add dressing.  Toss well to combine (I used a wooden spoon for this part to avoid the pasta taking too much abuse.

4.  Let sit for a few minutes for flavors to merry.  Eat and enjoy!

Note:  Enjoy leftovers within a few days since there are cucumbers in it and those go funky quickly.  When eating the leftovers let the salad sit out for a few minutes to come more up to room temperature as rice pasta has this tendency to get hard in the fridge.

Tuesday, May 8, 2012

Gluten Free S'Mores Recipe(s): Gluten Free Graham Crackers, Corn Syrup Free Marshmallows

S'Mores were definitely harmed in the making of this post ;)

I was trying to figure out how to do these recipes separately, but I'm sorry they just HAD to be posted together.  Why?  Because, my friends, it all comes together to make this lovely awesomeness that is oh-so-decadent and yummy!

When I was a kid we went camping CONSTANTLY, so s'mores were a normal part of our camping ritual and I loved every minute of it.  I just plain could NOT have my kids denied this pleasure just because of some annoying food allergies, so I went to work in my brain trying to come up with a way to make it happen.

You see, the commercially available gluten free graham cracker alternatives contain corn (of course), so that wasn't an option (trying to get the kids on a more gluten free diet for the sake of their allergies and tummies), so I had to be sneaky in the recipe trying to make these TASTE enough like graham crackers to trick them.  And I also wanted to make these as healthy as possible (yeah, I'm sad what can I say) and since marshmallows are just plain old whipped sugar (essentially) I figured I'd try to make up the nutrition on the cracker end.

And really, these came out really yummy.  I'm sorry for the whopping amount of fat in the recipe (8 whole tablespoons of butter, an entire stick, or of your favorite solid fat), but I messed with the recipe until the dough just plain came out RIGHT (not to mention the cracker) and that's what it took to come together.  Otherwise, though, the crackers are pretty darn healthy and I was happy that I was able to incorporate teff flour into a recipe and it worked well.  I used teff just because it just adds something to the depth of flavor in the recipe and is super good for you. If you don't have teff and have no desire to GET teff you could try using more sorghum flour in it's place, although I can't guarantee the crackers will taste as good.

So here you go folks.  The recipes you will need to make corn free and gluten free s'mores (along with egg free options too on the marshmallows :).  This post will be long, but oh so worth it!  Enjoy folks (I know I did...the s'mores were awesome that are in the picture by the way *laugh*).


Gluten Free Graham Crackers (gluten, egg, refined sugar free, dairy free option)

  • 1/2 cup sorghum flour
  • 1/3 cup teff flour
  • 1/3 cup sweet rice flour
  • 1/3 cup tapioca starch
  • 1/2 teaspoon salt
  • 1 teaspoon cinnamon
  • 1 teaspoon baking powder (Hain Featherweight is corn free)
  • 1 teaspoon guar gum
  • 1 stick cold butter (or 8 tbs. cold palm shortening or other hard fat), cut into small pieces
  • 1/4 cup honey
  • 1/4 cup cold water (estimated, see below for explanation)


1.  Preheat oven to 325 degrees.

2.  Measure all of your dry ingredients into the bowl of your food processor.  Pulse until the flours are well combined.

3.  Take your small pieces of butter and/or fat and add it to the now mixed flours in the food processor. Pulse until the butter is incorporated into the flours and the mixture resembles coarse cornmeal.

4.  Stir the honey and the water together (I used a liquid measuring cup to make the next bit easier) and then, with the food processor running, stream the honey water mixture into the dry ingredients until a soft dough is formed (you can't miss when this happens because you'll suddenly have a dough ball in your food processor).  Your dough should be soft and pliable and actually sort of wet (trust me you'll need the moisture :).

5.  Place dough in small bowl and refrigerate for about 1/2 hour to let the moisture absorb fully into the dough.

6.  Pull out two jelly roll pans of the same size (they should nest in each other) and I'll show you a cool trick.

Dough with top piece of parchment removed

6.  Turn one pan upside down and spread parchment on the upside down sheetpan.  Place your dough ball in the middle of the parchment paper and cover with another sheet of parchment.    Roll the dough until it's about 1/4 of an inch thick (I had to keep checking since my parchment paper is aluminum foil on the backside so I couldn't see through it at all).


7.  Now, the cool part.  Take your other jelly roll pan and nest it over your upside down pan, keeping the parchment over the top of the dough.  Move the pans over to the edge of your counter and place your hand firmly underneath the bottom pan (try to get as close to the center as you can comfortably do) and then flip the entire thing over upright.

8.  Remove the "now" top pan and the layer of parchment paper facing upwards at you and voila!  Nice and pretty dough perfectly rolled out for you without having to try and get into the pan to roll it out or trying to move the dough with threat of breakage.


9.  Cut dough (I find a pizza cutter is the ultimate tool for something like this) into graham cracker sized shapes (I went for smore sized on mine).  I got about 12 graham cracker sized crackers out of my sheet with some odd man out crackers which will be turned into graham cracker crusts later (waste not, want not :).

10.  Place pan in fridge for 15 minutes to let the dough get cold again (or, if you're me and don't have room in your fridge stick it in your freezer for about 3 minutes or so). This will help the fat melt slower in the oven, thus giving you more of a loft to your cracker.

11.  Bake the graham crackers until they are golden brown and starting to harden about 15 to 20 minutes (honestly it might take longer, but these will burn super fast, so start checking them at the 15 to 20 minute mark).

12.  Remove tray from oven and let the crackers cool on the pan until they cooled and have hardened as much as they are going to.  Break them apart (if need be) and store in an airtight container.  As you can see I Food Savered mine for longer storage capacity (I went with 4 crackers per unit so that I'd have enough for 2 s'mores per package).

These crackers are super yummy by the way.  I'm quite proud of myself :).


And now onto the marshmallows!

Okay, this first recipe I can say I tweaked, but it's certainly not mine.  I actually got this off of a Food Network holiday special...geez like five years ago?  In it they were giving ideas for home made Christmas gift ideas and Tyler Florence (I think it was him anyway) did hot chocolate mix and home made marshmallows.  I haven't been able to track down the written recipe, I've only got my little hand written one I got from watching the special over and over again.  I just upped the amount of gelatin used in it (if you can't do gelatin I've heard that agar agar works just as well in a 1 to one ratio.  I BELIEVE each packet of gelatin equates to 1 TBS in powdered measurement to give you a starting point there).  So, here you go folks.  Some recipes for corn free marshmallows (I'll give one afterward for a egg free alternative too).

If you have a small stand mixer or do NOT have a huuuuugggee honking bowl, you might want to split the first recipe in half.  It makes an entire jelly roll pan full of marshmallows (which is a LOT) and it also takes up this much room in a 7 quart stand mixer when it's done mixing...

So, this might get a bit cramped in a smaller stand mixer.  Just wanted to warn you.  If you do end up splitting it in half I'd use an 8 x 8 pan for the mixture to set up in.

Corn Free Marshmallows
  • 2 Cups Water
  • 3 Packages Unflavored Gelatin
  • 2 Cups Sugar (I used beet sugar this time around)
  • 2 Egg Whites
  • 2 Cups Powdered Sugar (Safeway sells a corn free powdered sugar in their O Organics line)

For Coating:
  • 1 Cup Arrowroot Starch
  • 1 Cup Powdered Sugar

Instructions:

1.  Mix water, sugar and gelatin in a saucepan and put under gentle heat until the gelatin is dissolved and everything is well incorporated.

2.  While the gelatin mixture is coming up to temp whip the confectioners sugar and egg whites in the bowl of your stand mixer to incorporate them together well.

3.  Line a jelly roll pan (fancy way of saying, "cookie sheet with a lip on it") with foil and/or parchment paper (I used parchment) and butter heavily (I just used olive oil cooking spray because I'm lazy like that).  I also butter underneath the parchment just to be sure that nothing slips underneath the parchment, sticks and causes problems later (it'll also help to hold the parchment paper down while you grease the top of it too). 

4.  Put arrowroot and powdered sugar for coating in a container with a tight fitting lid and then shake, shake shake to combine.  Take a wire mesh strainer and sprinkle the powdered sugar mixture into it and onto the buttered cookie sheet until well coated (don't skimp on this as it'll stop your marshmallows from sticking later!).

5.  Take gelatin mixture and dump into the stand mixer with your egg white mixture and then (if you are smart, trust me on this) take a clean dishtowel and quickly throw over the mixer and bowl (this will stop flying hot sugar from going all over your kitchen and potentially YOU).  Turn the mixer up as high as it will go and let er rip for 10 to 15 minutes.  The mixture will increase in volume a LOT and after 10 minutes or so you should be met with what looks to be marshmallow fluff and lots of it.


6.  Scoop mixture into the powder sugar coated cookie sheet/jelly roll pan, smoothing it out as best you can.  Then coat liberally with your arrowroot/powdered sugar mixture.

7.  Let sit overnight.

8.  In the morning (with your husband giving you weird looks while you're doing it), take a pizza cutter and cut the marshmallows to the size you like.  It helps if you dip the pizza cutter in your arrowroot mixture as you go to keep it from sticking to the marshmallows.  Once you have your "grid" figured out on your marshmallows, here's where the really messy part comes in.

9.  Take your marshmallows one at a time and coat them liberally in the arrowroot mixture and then place on cooling racks to dry (I place my cooling racks above more cookie sheets to catch most of the mess.  I literally dip the marshmallows in the sugar mixture just to be sure they get good coverage.

10.  Once done coating the marshmallows, good luck finding a spot to put 2 cookie sheets full of marshmallows to dry *laugh*.  Mine ended up in the middle of my kitchen table for the day.  Let sit until the outside forms of a nice "crust" on the marshmallows (it'll crunch when pushed, but you can pick them up and not have them stick to you type of crust).  Mine took about 8 to 10 hours to get where I was happy with them.

You can keep these in an airtight container for about 2 weeks.  You can keep them longer in your fridge (but they get sticky), or, you can do another (and wonderful to me) option and that is freeze them.  Yup, marshmallows freeze beautifully.  Who knew huh?  I now have 4 freezer bags full of marshmallows in my freezer to make treats out of later on.

 And now to the totally yummy part!  To make a s'more.  Take two graham crackers.  Take a marshmallow out of the freezer and place on one of the crackers.  Place in your microwave for 10 seconds (and watch the marshmallow expand!  It's pretty impressive).  When you pull it out the marshmallow will be ooey, gooey and melty.  Sprinkle some Enjoy Life Chocolate chips onto the marshmallow and place the other cracker on top.  And consume with lots of "yum" sounds (at least I hope so ;).

Enjoy all!

Wednesday, May 2, 2012

DIY Worcestershire Sauce Recipe (Garlic, Corn and Refined Sugar Free)

So, here is one recipe that I've been working on pretty much since my son got diagnosed with the garlic allergy.  Worcestershire Sauce is in everything and unfortunately has that dreaded garlic in it.  And, it turns out, it is NOT easy to make as it contains pretty much everything but the kitchen sink.  So, I started making sauces and messing with recipes.  I found a lot of them that just plain didn't work, like one I tried and it turned out tasting like sweet pickle relish (not bad, in itself as I can use the juice for when something calls for a little sweet pickle relish for the taste, but it was NOT exactly what I was going for), but it took me a while to get this formula right.  Now, if you want this to be TRULY right, add 1/4 cup of tamarind extract, only use 1/4 cup honey and leave out the lemon juice (I subbed for the tamarind extract due to not knowing exactly what allergens could be in it.  It's a date extract, so it would add a bit of depth of flavor that the recipe would lack.  I used lemon juice and honey to create the "sweet and sour" type of taste that the tamarind description stated).

So, here you guys go.  Worcestershire Sauce you can make yourself!  Enjoy!

Worcestershire Sauce (Garlic and Refined Sugar Free)

  • 2 cups apple cider vinegar
  • 1⁄2 cup molasses (Grandma's Mollases and Brer Rabbit Mollases are the most likely to be corn free options.  You could also use brown rice syrup if you wish).
  • 1⁄2 cup gluten free soy sauce or coconut aminos
  • 3 tbsp. yellow mustard seeds (you can also use black)
  • 3 tbsp. kosher salt
  • 1 tsp. whole black peppercorn
  • 1 tsp. whole cloves
  • 1⁄2 tsp. tumeric
  • 1 tsp. cardamom
  • 1/2 tsp. chile powder
  • 1 shallot, minced
  • 1  tsp. cinnamon
  • 1 anchovy, chopped
  • 1 sm. onion, minced
  • 1 TBS lemon juice
  • 1 tsp. ginger
  • 1⁄3 cup honey

 1. Combine all ingredients in a medium sized saucepan.  Bring to a boil and then reduce heat.  Simmer for 15 minutes.

2. Pour into quart mason jar.  Refrigerate, covered, for 3 weeks; strain to remove solids; return to jar. Refrigerate for up to 8 months.

Saturday, April 28, 2012

Allergy Friendly Millet Bread (Egg, Dairy, Soy, Corn, Coconut, Gluten, Yeast, Refined Sugar Free)

Just a couple of points before I start.  One:  I am so darn proud of myself as this was my first ever from scratch recipe that completely and utterly failed me about the first four times I made it.  No joke.  I've always been a person who has this fear of failure, so I feel GOOD for combating that fear and winning (I know I'm odd, but I would not let a loaf of bread mock me ;).  Two:   This also ties DIRECTLY into "Try Something New Saturday" as this was my first attempt at doing a "bread from scratch recipe" and MAN was it an ambitious one.  Read on to learn more.

So, what was this master plan of mine? It was a lofty ideal I was working toward as it was not only a "from scratch" bread that I wanted to develop, but an allergy friendly one at that and one that would not only taste good but also would be good for you.  I was working on it for a friend of mine who has children with numerous food allergies among them and she was trying to figure out how to get a bread recipe that they could all eat.  The biggest obstacles to surmount, for me were soy, corn, egg, pork, dairy and gluten, but I knew there had to be a way to overcome it all and get a bread her kids could eat, everyone in the family could enjoy and I could eat the results of around here from my experimenting (so it also had to be coconut free for the son).

So, I started working with recipes to see what I could come up with to help her out.  Unfortunately, after three failed attempts that would just fall apart as soon as I took them from the oven and had to be thrown away (it was sad, although I did snack on a lot of the crumbs), I quickly realized that bread needed these things called "binders" and the miniscule amount of stuff I had binding the recipe together was not going to cut it (there's a reason most gluten free breads call for like 4 to 5 eggs...the eggs take the place of gluten in the recipe).  So, I went and researched alternatives. 

Originally, I had ideals to make a gum free bread too (since I know that the gums can get to people's stomachs sometimes), but after researching binders I quickly realized there were problems to cutting out the gum.  Alternative binding agents for recipes were tofu (soy), yogurt (dairy or dairy alternatives that had potential soy contamination issues), gelatin (pork, which there was a pork allergy to worry about too), fruit (really didn't want the bread to taste fruity), etc.  So, I decided that a gum free bread just wasn't going to work.  So, I put some gum into the bread (guar gum for the sake of corn allergies) and some egg substitutes.  And, lo and behold, the bread came out of the oven and it was moist and bready (yes, that's a word ;).  And yummy...mustn't forget yummy!

My husband likens the taste of this bread to bran muffins, but I don't find it that "brany" tasting and it isn't quite as crumbly as bran muffins either, although it does have that quick bread vibe going on (like a lot of gluten free breads).  It does have a slightly sweet flavor to it though, that I actually really like, but if you aren't overly fond of it, just reduce the amount of honey in the recipe to 2 TBS or so.  It IS healthy for you, though, as it's got good-for-you flours in it and is free of refined sugars too.  By the way, this makes great toast too and if you are thinking of making sandwiches toasting is a must I'd say (unless you wrap it in some wax paper or something to help catch the crumble, because I think this stuff is going to crumble on you without toasting it with any type of real "bread abuse" like sandwiches call for).  I DID add almond meal to this (I got peanut free almond meal in the mail this week), so if you are nut free I'd suggest trying like pumpkin seed meal (throw some pumpkin seeds into a coffee grinder and let er' rip), or some other type of seed meal in it's place maybe.

But, the bottom line, is that this recipe did everything I wanted it to do and bonus it's yeast free so it takes five minutes to mix up and it's ready in less than an hour.  Beat that with a stick!

So, Shannon, my friend, this one's for you!


Gluten Free Millet Bread (Egg, Dairy, Soy, Corn, Coconut, Gluten, Yeast, Refined Sugar Free)

  • 1 cup millet flour
  • 1/2 cup almond meal
  • 1/2 cup sorghum flour
  • 1 TBS guar gum or Xanthum Gum (I used guar gum to make it corn free)
  • 2 TBS Chia or flax meal (grind chia seeds in coffee grinder for a few pulses to make chia meal if you are working with chia)
  • 6 TBS boiling water
  • 3 tablespoons baking powder (Hain Featherweight is corn free)
  • 1/2 teaspoon salt
  • 1/4 cup cooking oil of choice (I used olive oil)
  • 1/4 cup honey
  • 1 cup water
Directions

1. Preheat oven to 375F.  Make flax eggs by mixing flax meal with boiling water and let sit until gummy.

2. Grease a standard loaf pan (I used cast iron, but trust me greasing is a good idea with gluten free baking unless you relish eating it out of the pan).

3. Mix dry ingredients in a bowl well (I just use my hand and stir, some people use a whisk...whatever works for you).

4. Pour in cooking oil, honey, water and "flax eggs".

5. Stir completely until mix is thick and moist (stand mixers are your friends when it comes to this stuff).


6. Spoon batter into loaf pan and smooth top as best you can (makes it look better when it comes out of the oven).

Hot out of the oven!
7. Bake 40 to 45 minutes or until tester comes out clean.  Place on a clean dish towel, cooling rack, or pot holder to cool.  Let cool completely before slicing (it'll be less likely to crumble on you).  Slice and then store in freezer (my suggestion anyway as I'm not sure that this bread  won't grow stale quickly).  Best served toasted.

Enjoy all!  I know I will :).

Thursday, April 26, 2012

Recipe Share: BLTV Salad (Home Made Croutons and Dressing!)


So, tonight was one of those "seeking inspiration when you look at the clock and realize that it's dinnertime and you haven't even defrosted anything yet or sat down and even contemplated a menu plan for the week and it's Thursday" type of evenings.
 
It's been a long week already with appointments all around, stress over money (like who doesn't have that right?) and car problems with my husband's car that he's had since he was 16 (which led to part of my stress over money), so I just plain didn't have a lot of get-up-and-go in the elaborate meal department.  So, I threw open my fridge and scanned through what I had in five seconds flat or so and just started pulling things out onto the counter and then went to my freezer and found the one thing that would cook super quick (comparitively) even from frozen...fish!

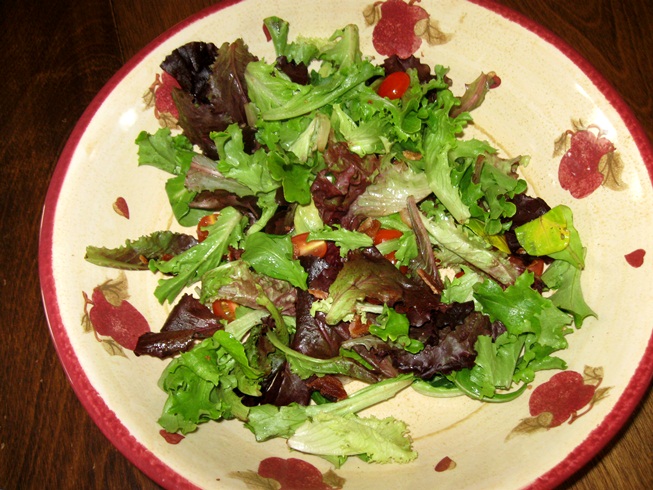
So, this meal was sort of thrown together, but it came out so well  that I decided to share it just to prove that I can actually share more than baked goods on the blog *laugh*.  I'm going to not share the fish recipe though as it was just fried up in the bacon "tid bits" left on the bottom of the cast iron skillet after I poured off the bacon grease, with some seasoning and then baked until done.  No biggie there.  The salad though, ohhh yes, the salad!

And yes, the pic above is accurate.  My husband was too busy working on the aforementioned car problems to eat dinner with me, so I was eating this wonderful dinner alone.  Probably one of the reasons why I got "taking picture" crazy with the food *laugh*.

***********************************

BLTV (Bacon, Lettuce, Tomato and Vinaigrette) Salad With Home Made Croutons
  • 4 Cups mixed greens (I buy the prepacked Field Greens from Carrs)
  • 1/2 container grape tomatoes, cut in half (can't do tomatoes?  Try dried apricots or dried cranberries.  Those would be tasty too!)
  • 4 Pieces Nitrate Free Bacon (I use Hormel brand), cooked till crispy (you can also microwave it in between pieces of paper towels for about 1 minute or so to get it crispy without a lot of the grease)
  • 1 Recipe Croutons (recipe follows)
  • 1 Recipe Creamy Vinaigrette (recipe follows)

1.  Wash greens and then put through salad spinner or dry between a few layers of paper towels to remove excess moisture (I put mine in the sink with 1/2 cup apple cider vinegar to help kill any errant bacteria for about 15 minutes...it'll also help to "perk up" wilting lettuce too).

2.  Place in large salad bowl (ain't mine cute?  I got it at the used store for 3.00 one fine day).  Add your tomatoes and then taking kitchen shears (I find this makes life easier) cut the bacon into "bits" over your salad. 

3.  I don't add croutons or salad dressing to the big bowl of salad to stop the croutons from getting mushy and to not put too much dressing on someone's salad.  So, serve with croutons and vinegarette.

********************************************

Gluten Free Croutons
  • 4 Pieces Udi's Gluten Free White Sandwich Bread or other gluten free bread of choice (you want an artisan style one if you have it)
  • Olive oil
  • Onion Powder
  • Salt
  • Italian Herb Blend Seasoning (I have a garlic free one I found at Three Bears in their bulk spices section)
1.  Preheat oven to 425 F.

2.  Cut four bread slices into about 1" squares (you know, crouton size) on a cutting board with a bread knife.  Place on a parchment lined baking sheet in a single layer (no overlapping).  Drizzle olive oil over the pieces and then toss the pieces with your (clean!) hands a couple of times to coat both sides of the bread well (trust me the residual olive oil on the baking sheet will be enough).

3.  Sprinkle liberally with onion powder, salt (I used iodized sea salt for this as you want a fine grind to it) and then sprinkle the Italian Herb Blend over the croutons.  Toss with fingers again to evenly distribute seasoning over bread pieces (trust me there's enough residual spices on your cookie sheet to get the job done).

4.  Place in 425 degree oven for 5 to 8 minutes.  Start checking the bread after 5 minutes, but do NOT leave your stove!  Trust me bread burns fast, so be sure to stay there and if you smell toast before 5 minutes is up it's time to get the door of the oven open).  When slightly brown on the edges (brown people not black) take a spatula and toss the croutons.

5.  Place back in oven for 1 to 2 more minutes to make sure both sides of the croutons are browned evenly (the second time things cook quicker, so once again DON'T LEAVE).  
6.  Remove cookie sheet to stove top and let bread cool for a few moments before placing in a bowl.  Serve with salad.
**********************************************

"Creamy" Vinaigrette
  • 1/2 Cup Olive Oil
  • 1/4 cup Red Wine Vinegar or Cider Vinegar
  • 1/2 TSP Ground Mustard Powder
  • 1/2 TSP Dried Basil
  • 1/2 TSP Onion Salt (use 1/4 tsp if using onion powder and then add salt to taste) or Garlic Salt
  • Pepper to taste
  • 2 TBS Nutritional Yeast or Parmesan Cheese (depending on dietary restrictions)

1.  Mix ingredients in salad dressing shaker.  Shake to combine (thus mustard will help to keep an emulsification going, but you still might have to shake the dressing by the end of the meal to re-combine the seasonings.  
2.  Serve over salad of choice.  Store in fridge (it'll solidify due to the oil being refrigerated, but just bring it back to room temperature the next time you need it) and shake before each initial use.

And there you go folks.  A nice salad, complete with dressing and croutons, for you to try out sometime.  Enjoy!

Sunday, April 22, 2012

DIY Gluten Free Bisquick (Allergy Friendly)

I've been messing with the idea of making my own Gluten Free Bisquick for a while (especially when you see the price attached to one box and a recipe of biscuits pretty much wipes out the box).  So, I went online and searched a LOT looking for a DIY Gluten Free Bisquick recipe.  Unfortunately for me the ONLY one I could find was the one I linked to ages ago (see the gluten free section of the blog to find that recipe).  But, the recipe had a lot of ingredients I plain don't have and after spending a good 100.00 or more on Amazon picking up corn, peanut and coconut free ingredients for things (among other stuff like a blender), I sure didn't want to have to shell out another twenty to thirty bucks for ingredients to make Bisquick.

So, I spent most of the day in the kitchen trying to concoct a Gluten Free Bisquick recipe that worked okay, but also that didn't contain a lot of stuff added (like dried buttermilk powder) to be more allergen friendly.  So, after one batch that came out tasting REALLY nasty (yeah, don't ask), one batch that was okay and one that was fair, I finally decided to drop the oil out of the recipe (to make it more like Gluten Free Bisquick compared to traditional Bisquick) and the recipe worked a lot better without me having to add a lot of different "stuff" to make it work better.  I really think that making it so you add your own oil, while making it harder to use it with traditional Bisquick recipes, makes it easier to work with.  I can sort of understand why Bisquick made the formula they did for gluten free Bisquick now, honestly.

This by no means is an opus recipe folks.  If anyone can improve on this I not only encourage you, I beg you to do so :).  As I've said there is only ONE other recipe out there for DIY Gluten Free Bisquick and this is the only one (right now) that doesn't contain specialty ingredients.  Also, allow yourself some wiggle room with this.  Depending what flours you use, you might end up having to add more liquid (coconut flour for instance) while almond meal would give you a different texture (denser) than say millet flour in your baked goods.  So, give yourself some room to play as you are baking.  If it looks off when you put the recipe together add more baking mix or more liquid (I usually mess with the milk part of the recipe for simplicity's sake) until it comes together right.  I didn't really have issues with that, but it really will depend on the flours you use.

So, here you are folks.  One Gluten Free Bisquick recipe.  I tried this out on pancakes, muffins and drop biscuits (all seen above).  Pancakes, by far, were my favorite (just because I was in the mood for pancakes), followed by the drop biscuits and finally followed up by the muffins (but I've always had that problem with regular Bisquick when I'd make it into muffins, so I'm not holding it against the recipe *laugh*.  I followed a recipe I found online to use using GF Bisquick and the muffins just weren't sweet enough).


Homemade Bisquick/Master Mix Recipe
Ingredients:

  • 6 Cups, total, flours of choice (For this experiment I did,  2 Cups Brown Rice Flour, 2 cups Sweet White Rice Flour and 2 Cups Millet Flour.  I'd normally have done almond meal in place of the white rice flour, but I'm waiting for my peanut free almond meal to come in the mail.  I want my son to be able to eat the stuff I make :)
  • 2/3  Cups Starch of choice (I used tapioca starch.  Potato starch, if you can tolerate it, would be better here, I think, but I was almost out)
  • 1 TBS Xanthum Gum or Guar Gum
  • 3 TBS baking powder
  • 1 TBS salt
  • 1/4 cup sugar of choice (yes, sugar.  It adds a little something to the mix.  Just trust me on this.  At least it's not the second ingredient in the recipe like in the REAL Gluten Free Bisquick right?)

Directions:

1.  Measure ingredients and place in large bowl.  Whisk all ingredients well to combine.  Store in airtight container.

2.  Use as you would Gluten Free Bisquick (not traditional Bisquick as Gluten Free Bisquick doesn't contain solid fats like the original Bisquick does)

Here's a couple of recipes to get your feet wet...

Pancakes
  • 1 Cup GF Master Mix
  • 1 Cup Milk
  • 2 TBS oil of choice
  • 1 egg

Prepare as you would regular pancakes.
 And here's another one...

Biscuits
  • 2 Cups GF Master Mix
  • 1/3 Cup Shortening or solid fat
  • 2/3 cup milk
  • 3 eggs

1.  Heat oven to 400 degrees F.

2.  Cut shortening into mix, using fork or tips of fingers, until the particles in mixture are the size of small peas.  Stir in remaining ingredients until soft dough forms.

3.  Drop by spoonfuls onto ungreased cookie sheet.

4.  Bake 13 to 16 minutes or until golden brown.

Makes 10 biscuits.

Enjoy folks and I hope some of you can take this, spin it, and make some truly mind blowing awesome mix out of it!  If you do, though, please promise to e-mail me and share *laugh*.

Monday, March 19, 2012

Recipe Share: DIY McCormick Montreal Steak Seasoning

My most missed spice seasoning blend.
*Mad Scientist laugh*  I've done it!!!  I've finally cracked the "code" to make a good variation of McCormick Montreal Steak Seasoning that is garlic free!!!

Ahem.  Okay, well it's not perfect, but it's still a darn good spice mix if I do say so myself.  This would be a good one if you just don't want to shell out a whole bunch of money to buy grill seasoning too (which I used to do without even a second thought.  I still miss some of my spice blends).

I'm still working on a Worcestershire Sauce alternative (I THINK I'm on the right track now), but for the time being folks, here's a good spice blend to start your day.  By the way, blogging was delayed over the weekend because something in my internet connection died.  After doing everything but beating my computer with a rubber chicken and shouting, "Out!  Out! You demons of stupidity!!!" I was able to get my internet connection working today through some miracle.  Even with little sleep and a bad chest cold.  So, yay me :).

This recipe is actually a tweak off of a recipe that my mom sent me that my sister found online on some forum a while back, so don't ask me where it originally came from as I have no idea.   But, anyway, here's my attempt to make a good alternative to McCormick Montreal Steak Seasoning.  Enjoy!

DIY Montreal Steak Seasoning
  • 4 TBS salt
  • 1 TBS ground black pepper 
  • 1 TBS onion powder or 1 1/2 TBS dehydrated onion
  • 1 Teaspoon Cheyenne Pepper, or to taste (or you can substitute 1/2 TBS crushed red pepper flake)
  • 1/2 TBS dried thyme
  • 1/2 TBS dried rosemary
  • 1/2 TBS dried fennel seed
  • 1 Teaspoon dried orange or lemon peel
1.  This is essential.  If you are use "chunky" bits in the recipe above (dehydrated onion, chunky sea salt, thyme leaves, whole rosemary leaves, etc) instead of powders you will want to put them ALL through a coffee grinder for a few pulses to make a powder along with the fennel seed.  This VASTLY improves the final quality of your spice mix and makes it adhere to meat better and incorporate into ground meats MUCH better.  I learned this the hard way.

2.  If not using chunky pieces, place your orange and/or lemon peel (I've used both home made dried orange zest and lemon zest in this, so I ended up with bigger pieces that needed some pulsing) in a coffee grinder along with the fennel seed.  Pulse a few times to make it more "powder like" and then add all ingredients to a mason jar, shake to combine well and store in a shaker or spice container of choice.

Use as you would grill seasoning in all of your grill seasoning needs.

I have tweaked this recipe a LOT and tried doing the "chunkier" version like McCormick does where you could actually see things like the fennel seed, but it just plain didn't work as home made versions tend to lack the binders that commercial products use (like starches) to get them to adhere to the meat or something. Honestly, I'm not sure if they add anything to their spices, but all I know is that every time I did it where I didn't at least partially grind the spices first I'd just end up with a very bare piece of meat after it was all said and done because the seasonings would just plain fall off of whatever I was grilling/browning...especially things like fennel seed.  And with just plain dehydrated onions, unless you were cooking say meatloaf, the onions just wouldn't cook/rehydrate before the meat was done, so you'd end up with a pretty crunchy onion-tasting piece of meat.  Not my thing.

I am very pleased with how the powdered version worked, though.  I even found that I LIKE the Cheyenne pepper in it, and I'm usually not a person who likes heat in my spice mixes (I'm not even sure what inspired me to put that in there honestly *laugh*).  It gives a LITTLE bit of heat in the background, but nothing too over-powering and you don't even miss the garlic (least I don't).  If you can add garlic to your things or like garlic, I'd add like 1 teaspoon to 1/2 TBS garlic powder to the mix too.

So, there you are folks.  My own home made recipe for grill seasoning.  Enjoy it!